 Indent in Excel
When creating a budget or Income Expense statement you usually have the title Income and the title Expense. Under each of these titles are the itemized items for each category.
To make the individual itemized items stand out a little bit we make the title bold and/or italic. Another way to have them stand out is to indent those cells. Looks great.
Years and years ago we would go into edit mode, hit home, hit the spacebar a couple of times and then hit enter. We would repeat this for each line we wanted indented. Today it is very easy!
#NoTears
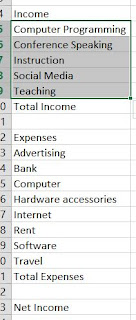
Below is a list of categories.
1. Highlight the income categories. Do not include the heading or Total.

2. Click the Home tab.
3. In the middle bottom row of the Alignment section, click on the Increase Indent once.
It is the right one with the blue arrow pointing to the right.
Note: If you move you mouse over top of an icon, a help box will appear identifying and explaining the item your mouse if over.

The text is now indented 2 spaces, as shown below. Note you may have to increase the column width.
Before moving on to select the Expenses' items:
4. Click on the Increase Indent once more. The text is indented again 2 spaces.
You may or may not like this. This might be too much.
If you think you have indented too much then click on the Decrease Indent button in the Alignment section of the Home tab. The one of the left with the blue arrow pointing to the left.

5. Select the cells for the Expense category
6. Click on Increase Indent once to match the alignment of the Income categories.


No comments:
Post a Comment